Spring Boot OAuth2 Social Login with Google, Facebook, and Github - Part 1
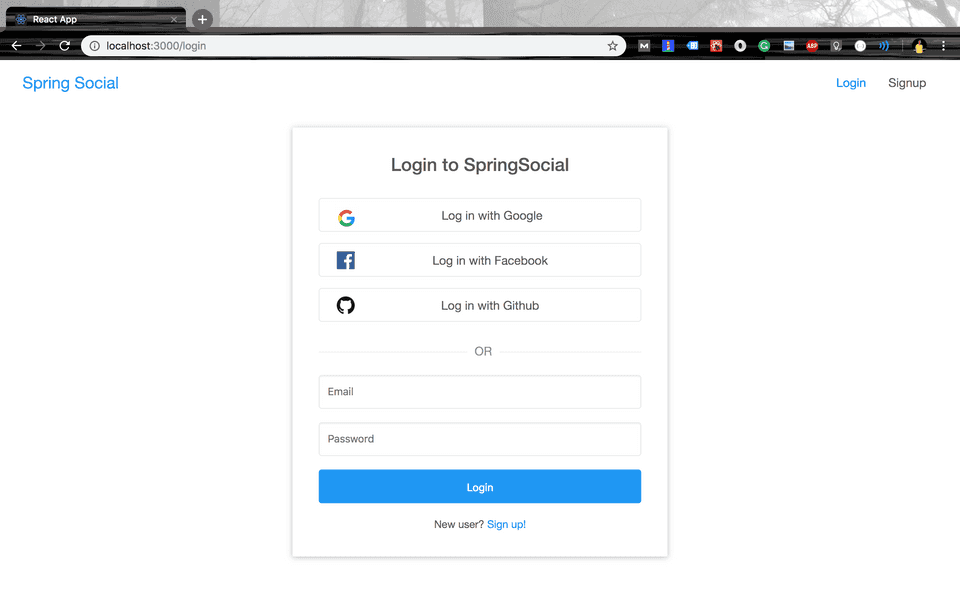
Spring BootNovember 06, 20183 mins readHello and Welcome to the Spring Boot Social Login tutorial series. In this tutorial series, you’ll learn how to add social as well as email and password based login to your spring boot application using the new OAuth2 functionalities provided in Spring Security.
We’ll use MySQL database to store user’s information. For the frontend part, we’ll use React, my favorite Javascript framework.
If you just want the code, you can find it on Github.
Creating the Project
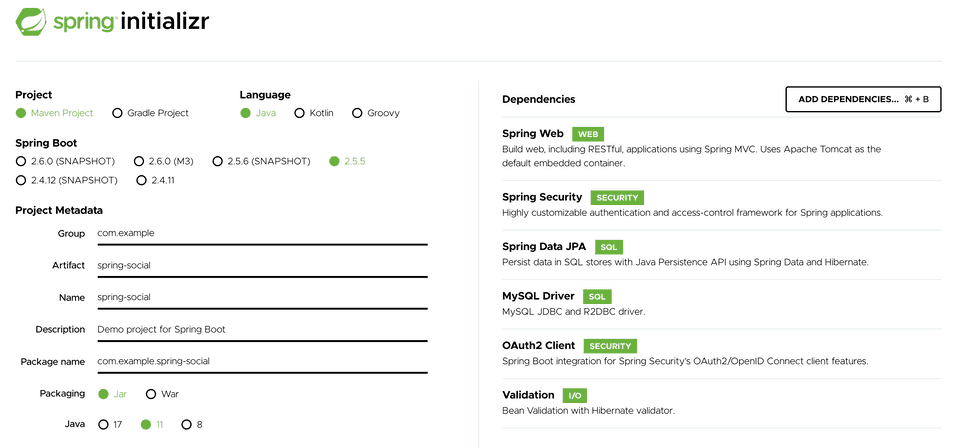
Let’s create our project using Spring Initializr web tool. Head over to http://start.spring.io, fill in the details as follows:
- Artifact: spring-social
- Dependencies: Spring Web, Spring Security, OAuth2 Client, Spring Data JPA, MySQL Driver, Validation
You can leave the rest of the fields to their default values and click Generate to generate and download the project -
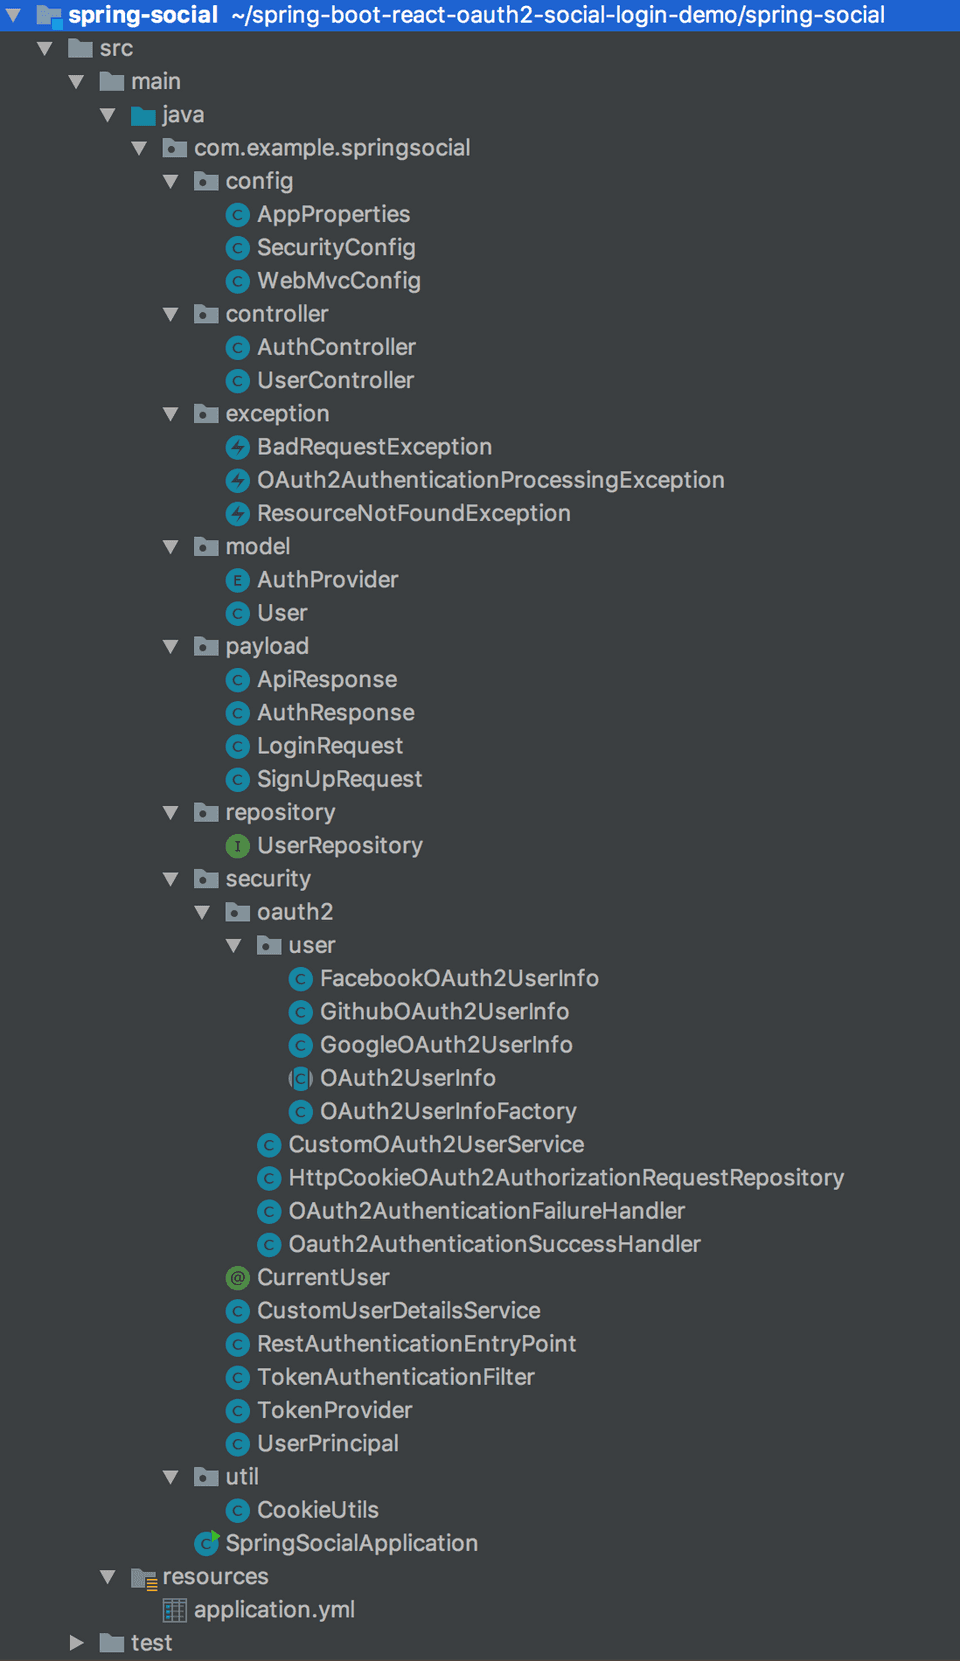
Directory structure of the complete project for reference
Following is the directory structure of the complete project for your reference. We’ll create all the classes and interfaces one by one and understand their details:
Additional dependencies
We’ll need to add few additional dependencies to our application that are not present in spring initializr web tool. Open the pom.xml file located in the root directory of the project and add the following dependencies -
<!-- JWT library -->
<dependency>
    <groupId>io.jsonwebtoken</groupId>
    <artifactId>jjwt-api</artifactId>
    <version>0.11.2</version>
</dependency>
<dependency>
    <groupId>io.jsonwebtoken</groupId>
    <artifactId>jjwt-impl</artifactId>
    <version>0.11.2</version>
    <scope>runtime</scope>
</dependency>
<dependency>
    <groupId>io.jsonwebtoken</groupId>
    <artifactId>jjwt-jackson</artifactId>
    <version>0.11.2</version>
    <scope>runtime</scope>
</dependency>
Creating OAuth2 apps for social login
To enable social login with an OAuth2 provider, you’ll need to create an app in the OAuth2 provider’s console and get the ClientId and ClientSecret, sometimes also called an AppId and AppSecret.
OAuth2 providers use the ClientId and ClientSecret to identify your app. The providers also ask for many other settings that include -
Authorized redirect URIs: These are the valid list of redirect URIs where a user can be redirected after they grant/reject permission to your app. This should point to your app endpoint that will handle the redirect.
Scope: Scopes are used to ask users for permission to access their data.
Creating Facebook, Github, and Google Apps
Facebook App: You can create a facebook app from the Facebook apps dashboard
Github App: Github apps can be created from https://github.com/settings/apps.
Google Project: Head over to Google Developer Console to create a Google Project and the credentials for OAuth2.
For the purpose of this article, creating the OAuth2 apps are not mandatory. I have already created a demo app for Facebook, Google, and Github. We’ll use the demo apps to perform social login.
Configuring the Spring Boot application
Spring boot reads configurations from src/main/resource/application.properties file by default. It also supports .yaml configurations. In this project, we’ll use yaml configurations because they represent hierarchical data more clearly.
Rename application.properties file to application.yaml and add the following configurations -
spring:
    datasource:
        url: jdbc:mysql://localhost:3306/spring_social?useSSL=false&serverTimezone=UTC&useLegacyDatetimeCode=false
        username: root
        password: callicoder

    jpa:
        show-sql: true
        hibernate:
            ddl-auto: update
            naming-strategy: org.hibernate.cfg.ImprovedNamingStrategy
        properties:
            hibernate:
                dialect: org.hibernate.dialect.MySQL5InnoDBDialect
    security:
      oauth2:
        client:
          registration:
            google:
              clientId: 5014057553-8gm9um6vnli3cle5rgigcdjpdrid14m9.apps.googleusercontent.com
              clientSecret: tWZKVLxaD_ARWsriiiUFYoIk
              redirectUri: "{baseUrl}/oauth2/callback/{registrationId}"
              scope:
                - email
                - profile
            facebook:
              clientId: 121189305185277
              clientSecret: 42ffe5aa7379e8326387e0fe16f34132
              redirectUri: "{baseUrl}/oauth2/callback/{registrationId}" # Note that facebook now mandates the use of https redirect URIs, so make sure your app supports https in production
              scope:
                - email
                - public_profile
            github:
              clientId: d3e47fc2ddd966fa4352
              clientSecret: 3bc0f6b8332f93076354c2a5bada2f5a05aea60d
              redirectUri: "{baseUrl}/oauth2/callback/{registrationId}"
              scope:
                - user:email
                - read:user
          provider:
            facebook:
              authorizationUri: https://www.facebook.com/v3.0/dialog/oauth
              tokenUri: https://graph.facebook.com/v3.0/oauth/access_token
              userInfoUri: https://graph.facebook.com/v3.0/me?fields=id,first_name,middle_name,last_name,name,email,verified,is_verified,picture.width(250).height(250)
app:
  auth:
    tokenSecret: 04ca023b39512e46d0c2cf4b48d5aac61d34302994c87ed4eff225dcf3b0a218739f3897051a057f9b846a69ea2927a587044164b7bae5e1306219d50b588cb1
    tokenExpirationMsec: 864000000
  cors:
    allowedOrigins: http://localhost:3000 # Comma separated list of allowed origins
  oauth2:
    # After successfully authenticating with the OAuth2 Provider,
    # we'll be generating an auth token for the user and sending the token to the
    # redirectUri mentioned by the client in the /oauth2/authorize request.
    # We're not using cookies because they won't work well in mobile clients.
    authorizedRedirectUris:
      - http://localhost:3000/oauth2/redirect
      - myandroidapp://oauth2/redirect
      - myiosapp://oauth2/redirect
The datasource configurations are used to connect to the MySQL database. Please create a database named spring_social and specify correct values for spring.datasource.username and spring.datasource.password as per your MySQL installation.
The security.oauth2 configurations define all the oauth2 providers and their details. The app.auth configurations are used to generate a JWT authentication token once the user is successfully logged in.
Notice the use of redirectUriTemplate property in all the registered oauth2 providers. When you create an app in these OAuth2 providers websites, you must add an authorized redirect URI that matches this template. For example, for your google app, you need to add the authorizedRedirectURI http://localhost:8080/oauth2/callback/google.
Binding AppProperties
Let’s bind all the configurations prefixed with app to a POJO class using Spring Boot’s @ConfigurationProperties feature-
package com.example.springsocial.config;

import org.springframework.boot.context.properties.ConfigurationProperties;

import java.util.ArrayList;
import java.util.List;

@ConfigurationProperties(prefix = "app")
public class AppProperties {
    private final Auth auth = new Auth();
    private final OAuth2 oauth2 = new OAuth2();

    public static class Auth {
        private String tokenSecret;
        private long tokenExpirationMsec;

        public String getTokenSecret() {
            return tokenSecret;
        }

        public void setTokenSecret(String tokenSecret) {
            this.tokenSecret = tokenSecret;
        }

        public long getTokenExpirationMsec() {
            return tokenExpirationMsec;
        }

        public void setTokenExpirationMsec(long tokenExpirationMsec) {
            this.tokenExpirationMsec = tokenExpirationMsec;
        }
    }

    public static final class OAuth2 {
        private List<String> authorizedRedirectUris = new ArrayList<>();

        public List<String> getAuthorizedRedirectUris() {
            return authorizedRedirectUris;
        }

        public OAuth2 authorizedRedirectUris(List<String> authorizedRedirectUris) {
            this.authorizedRedirectUris = authorizedRedirectUris;
            return this;
        }
    }

    public Auth getAuth() {
        return auth;
    }

    public OAuth2 getOauth2() {
        return oauth2;
    }
}
Enabling AppProperties
We’ll need to enable configuration properties by adding the @EnableConfigurationProperties annotation. Please open the main application class SpringSocialApplication.java and add the annotation like so-
package com.example.springsocial;

import com.example.springsocial.config.AppProperties;
import org.springframework.boot.SpringApplication;
import org.springframework.boot.autoconfigure.SpringBootApplication;
import org.springframework.boot.context.properties.EnableConfigurationProperties;

@SpringBootApplication
@EnableConfigurationProperties(AppProperties.class)
public class SpringSocialApplication {

	public static void main(String[] args) {
		SpringApplication.run(SpringSocialApplication.class, args);
	}
}
Enabling CORS
Let’s enable CORS so that our frontend client can access the APIs from a different origin. I’ve enabled the origin http://localhost:3000 since that is where our frontend application will be running.
package com.example.springsocial.config;

import org.springframework.beans.factory.annotation.Value;
import org.springframework.context.annotation.Configuration;
import org.springframework.web.servlet.config.annotation.CorsRegistry;
import org.springframework.web.servlet.config.annotation.WebMvcConfigurer;

@Configuration
public class WebMvcConfig implements WebMvcConfigurer {

    private final long MAX_AGE_SECS = 3600;

    @Value("${app.cors.allowedOrigins}")
    private String[] allowedOrigins;

    @Override
    public void addCorsMappings(CorsRegistry registry) {
        registry.addMapping("/**")
        .allowedOrigins(allowedOrigins)
        .allowedMethods("GET", "POST", "PUT", "PATCH", "DELETE", "OPTIONS")
        .allowedHeaders("*")
        .allowCredentials(true)
        .maxAge(MAX_AGE_SECS);
    }
}
Creating the database entities
Let’s now create the Entity classes of our application. Following is the definition of the User class -
package com.example.springsocial.model;
import com.fasterxml.jackson.annotation.JsonIgnore;

import javax.persistence.*;
import javax.validation.constraints.Email;
import javax.validation.constraints.NotNull;

@Entity
@Table(name = "users", uniqueConstraints = {
        @UniqueConstraint(columnNames = "email")
})
public class User {
    @Id
    @GeneratedValue(strategy = GenerationType.IDENTITY)
    private Long id;

    @Column(nullable = false)
    private String name;

    @Email
    @Column(nullable = false)
    private String email;

    private String imageUrl;

    @Column(nullable = false)
    private Boolean emailVerified = false;

    @JsonIgnore
    private String password;

    @NotNull
    @Enumerated(EnumType.STRING)
    private AuthProvider provider;

    private String providerId;

    // Getters and Setters (Omitted for brevity)
}
The User class contains information about the authentication provider. Following is the definition of the AuthProvider enum -
package com.example.springsocial.model;

public enum  AuthProvider {
    local,
    facebook,
    google,
    github
}
Creating the repositories for accessing data from the database
Let’s create the repository layer for accessing data from the database. The following UserRepository interface provides database functionalities for the User entity. Thanks to Spring-Data-JPA, we don’t need to write much code here -
package com.example.springsocial.repository;

import com.example.springsocial.model.User;
import org.springframework.data.jpa.repository.JpaRepository;
import org.springframework.stereotype.Repository;

import java.util.Optional;

@Repository
public interface UserRepository extends JpaRepository<User, Long> {

    Optional<User> findByEmail(String email);

    Boolean existsByEmail(String email);

}
What’s next?
In this article, we configured our application and defined the entity classes and repositories. In the next article, we’ll learn how to perform social as well as email/password based login using Spring Security.
Read Next: Spring Boot OAuth2 Social Login with Google, Facebook, and Github - Part 2


